
How does a solo gamer approach a task like this?
First thing is to decide on a battle/scenario that both suits your mood and of course your collection of figures. Next, create a battlefield with some terrain for your tiny warriors to navigate through. This is a task I particularly enjoy, the terrain doesn't have to be out of this world, functional is the key, however if you have top notch, top of the range scenery, then all the better for the effect it gives.
Below is an example of a set up for a game I am about to play. My gaming table is actually eight feet long and three feet wide, I do have an extra one foot in the form of a hinged flap along one of the long edges, giving me the potential for a width of four feet. However, my games room is quite narrow and cluttered at the moment and needs a tidy up, (another job on my list.)
On the table is a Cigar Box Battle Mat, it could just as easily be a sheet of green or brown cloth, it measures six feet by four feet, so a foot is hanging down along with the flap, giving me a fighting field of 6 x 3 feet. A little tight for 28mm figures, but it will have to do for now.
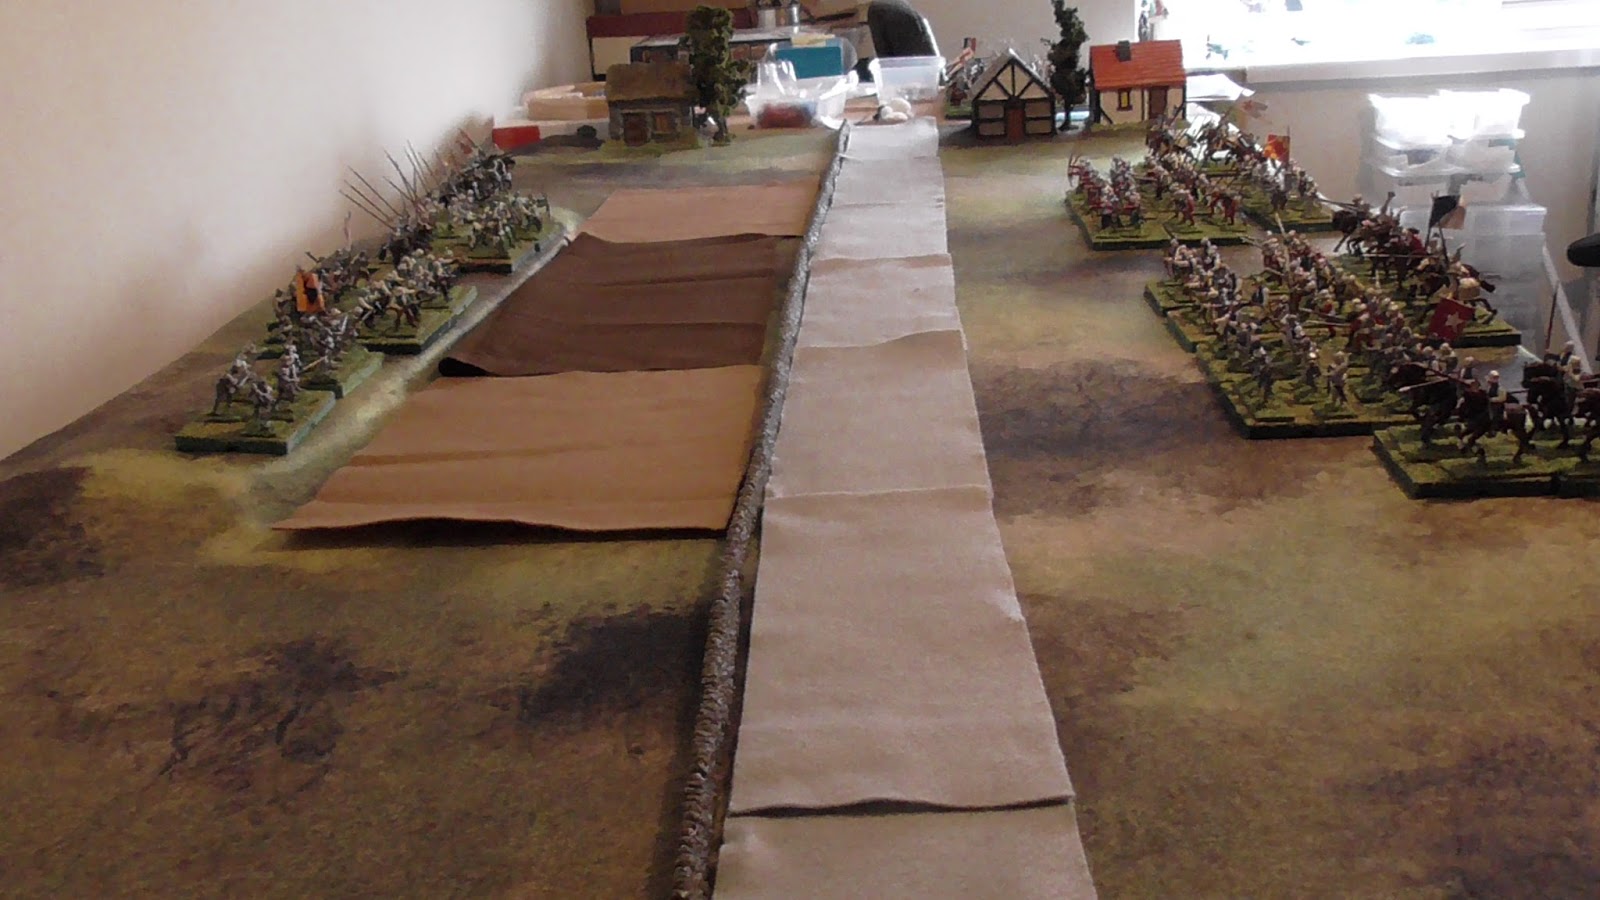
Running down the table in the centre is a road, made of felt strips, alongside the road is a stone wall running the entire length. The rectangles of brown/beige felt are there to simulate boggy ground behind which is a low ridge line, that is simply a towel laid out under the mat. Finally at the far end of the table is a small village. Beyond the village and the edge of the mat, is a handy two feet of extra table space for rule books, dice, figures, markers etc.
Finally of course are the all important minis. Standing proud on the ridge line to the left is the Yorkist 'Battle' of Sir Godfrey Howard. Facing him are two 'Battles' nearer the camera is the overall Lancastrian commander, Lord Sir Benedict Foxe and to his right, his ally Sir Ralph Lytton.
Sir Godfrey's men have the advantage of the ridge, which itself is protected by boggy ground which will slow down anyone attempting to cross it. He has four units of either archers or crossbowmen in mixed units with either Bill men or spear men. He also has two units of foot knights and finally one unit of mounted men at arms, or knights to you and I.

Sir Godfrey knows that at some time during the battle, if he survives long enough, another 'Battle' belonging to his superior Sir Walter de Cobham, will arrive as reinforcements. He will need to hang on until that force arrives. At the moment he is outnumbered by 2:1. Although he occupies the high ground and that too is protected somewhat by the boggy ground, he does have the problem of that stone wall. It is situated within bow and crossbow range, he can reach it with aerial weapons, and of course any Lancastrian archers/crossbowmen stood behind the wall can also reach his troops. Any troops stood right behind the wall will gain some protection from it and as such will weaken the impact of the Yorkist arrows and bolts.
The two Lancastrian 'Battles' can feel quite confident at the moment, but the two commanders also know that Yorkist reinforcements are rushing to the scene.
Sir Ralph's Battle nearest the camera.
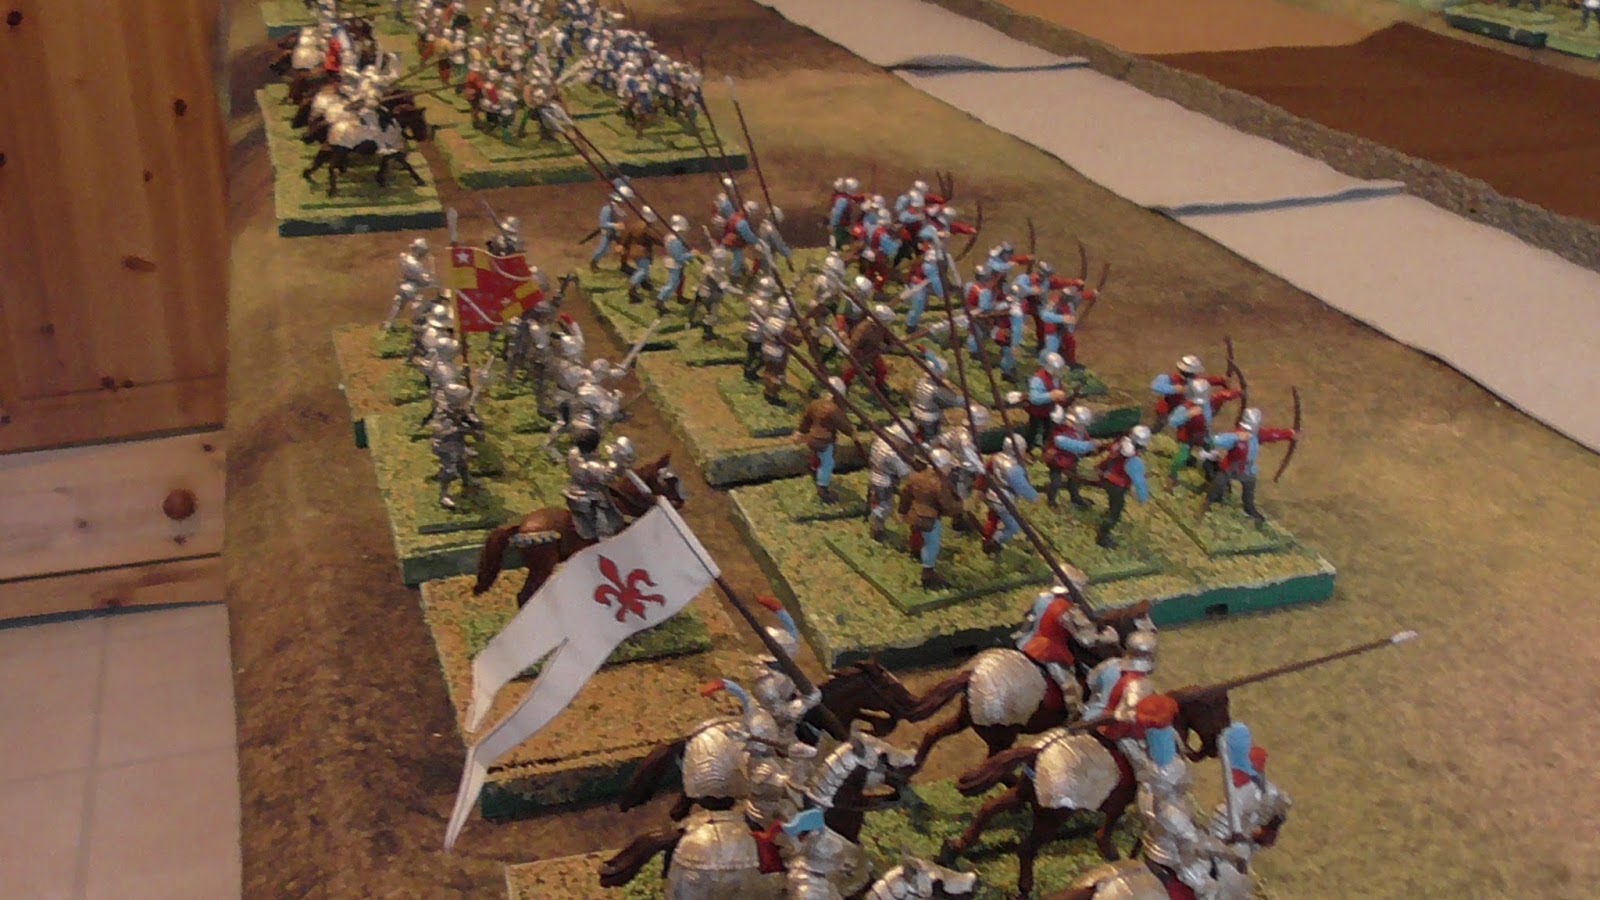
Lord Sir Benedict's 'Battle' beside him. These forces are made up of similar units to their enemy.

Another couple of views from the front of the two Lancastrian 'Battles.'


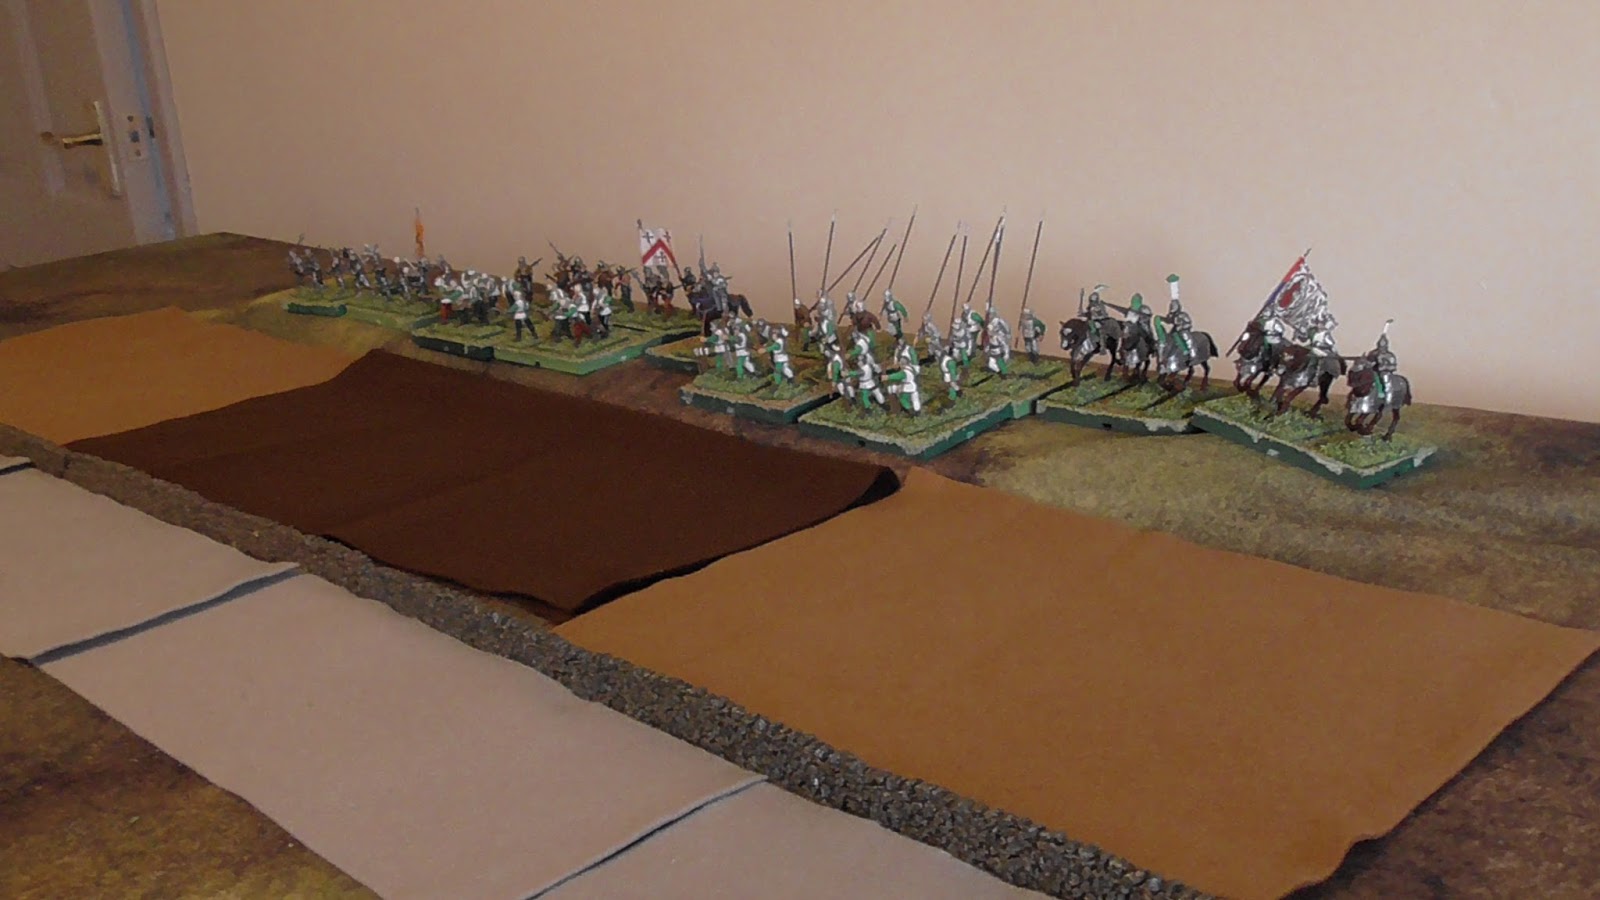
This is the reinforcements for the Yorkists in the form of Sir Walter's 'Battle' The problem is no one knows when this force will arrive on the table, it being decided by a die roll at the end of each Yorkist turn. If fortunate they could arrive at the end of turn 2 or each turn up to and including turn 7.

The reinforcements will appear at the end of this road on the Lancastrian left which of course is the Yorkist right flank.

A general view of the troops facing each other, not visible in this view is a unit of light cavalry to the left of the Lancastrian line and likewise a unit of mounted men at arms, to their right.

The Lancastrians have the first turn, and it is now time for the solo gamer to assume a dual personality. You now become the force commanders, both of them! You have to remain impartial and most importantly do the very best in your role for each cause. You will set a problem for the enemy and then you will have to solve that problem upon switching hats, or helmets in this case. You are your own opponent!
I was just about to write down my plans as firstly the Lancastrian commander followed by the Yorkist, but you will be able to find out my thoughts if you watch the battle report which will be uploaded on completion of the battle.
No instead, you assume the roles of both commanders and let me know your battle plans how will you tackle this conumdrum? What is going through your mind?
No comments:
Post a Comment
Note: Only a member of this blog may post a comment.